

Activate keyframing
To animate an effect property, you must activate keyframing for that property in the Effect Controls panel. Once keyframes are activated, you can add and adjust as many keyframes as you need for animating the effect’s property.
- Make sure you have a sequence with clips in the Timeline panel. By default, the Fixed effects (Motion, Opacity, and Volume) are applied to clips in the video and audio tracks.
- (Optional) Add Standard effects to clips.
- Do any of the following:
-
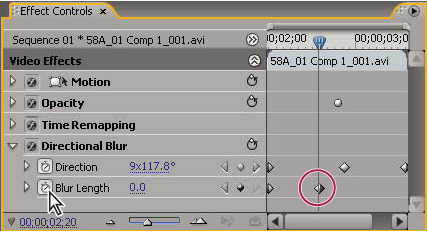
In the Effect Controls panel, first select the clip in the Timeline panel that contains the effect you want to animate, and then in the Effect Controls panel, click the triangle to expand the controls of the effect you want to animate.
-
In the Timeline panel, click the Show Keyframes icon
 and
choose any option from the menu except Hide Keyframes. The Add/Delete
Keyframes button is activated for keyframing. You can immediately
start adding and adjusting keyframes only for Fixed Effects in the
Timeline panel. Keyframing for Standard effects must be first activated
in the Effect Controls panel.
and
choose any option from the menu except Hide Keyframes. The Add/Delete
Keyframes button is activated for keyframing. You can immediately
start adding and adjusting keyframes only for Fixed Effects in the
Timeline panel. Keyframing for Standard effects must be first activated
in the Effect Controls panel.
-
- In the Effect Controls panel, click the triangle next to the effect property you want to animate.
- Click the Toggle Animation button
 next
to the property name. A keyframe appears at the current time. Keyframing
is now activated for an effect’s property.
next
to the property name. A keyframe appears at the current time. Keyframing
is now activated for an effect’s property.