

Foam effect
This effect generates bubbles that flow, cling, and pop. Use the effect’s controls to adjust attributes for the bubbles such as stickiness, viscosity, life span, and bubble strength. You can control exactly how the foam particles interact with each other and with their environment, and specify a separate layer to act as a map, controlling precisely where the foam flows. For example, you can have particles flow around a logo or fill a logo with bubbles.
This effect works with 8-bpc color.
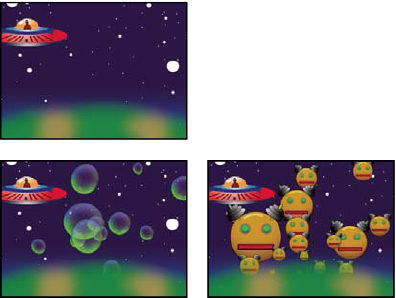
You can also substitute any image or movie for bubbles. For example, you can create swarms of ants, flocks of birds, or crowds of people.
 View controls
- Draft
- Displays the bubbles without fully rendering them. This is a fast way to preview the behavior of the bubbles. Draft mode is the only way to preview the universe edges, the Flow Map alignment, and the Producer location, orientation, and size. Bubbles are represented by blue ellipses. The Producer Point is represented by a red ellipse. The bubble universe is represented by a red rectangle.
- Draft + Flow Map
- Displays the Draft view wireframe superimposed over a grayscale representation of the flow map, if selected.
- Rendered
- Displays the final output of the animation.
Producer controls
The Producer controls specify the location where the bubbles originate, as well as the speed at which they are generated:
- Producer Point
- The center of the area from which the bubbles can be produced.
- Producer X Size, Producer Y Size
- Adjust the width and height of the area from which the bubbles can be produced.
- Producer Orientation
- Adjusts the rotation (orientation) of the area from which the bubbles can be produced. Producer Orientation has no noticeable effect when Producer X Size and Producer Y Size are identical.
- Zoom Producer Point
- Specifies whether the producer point and all of its associated keyframes remain relative to the universe (selected) or to the screen (unselected) when you zoom in or out on it. For example, if you set a position for Producer Point in the upper-left corner of the layer and then zoom out on that layer, the producer point stays in the upper-left corner of the screen if you don’t select Zoom Producer Point. If you select Zoom Producer Point, the point moves with the universe as it is zoomed out, and the point ends up closer to the center of the screen.
- Production Rate
-
Determines the rate at which bubbles are generated. This control
does not affect the number of bubbles per frame. Rather, the rate
is the average number of bubbles generated every 30th of a second.
Higher numbers yield more bubbles.
 If a large
number of bubbles appear in the same point at the same time, some may
pop. If you want a lot of foam, increase the values for Producer
X Size and Producer Y Size so that the bubbles don’t immediately
pop each other.
If a large
number of bubbles appear in the same point at the same time, some may
pop. If you want a lot of foam, increase the values for Producer
X Size and Producer Y Size so that the bubbles don’t immediately
pop each other.
Bubbles controls
- Size
- Specifies the average size for adult bubbles. Size Variance, Bubble Growth Speed, and Random Seed also affect the size of a bubble in any particular frame.
- Size Variance
- Specifies the range of possible bubble sizes. This control uses the Size value as the average and creates smaller-than-average and larger-than average-bubbles by using the range you specify here. For example, a default bubble Size of 0.5 and default Size Variance of 0.5 generate bubble sizes ranging from 0 to 1 (0.5 –.5 = 0 and 0.5 + 0.5 = 1).
- Lifespan
- Specifies the maximum life of a bubble. This value is not absolute; if it were, the bubbles would all pop after the same lifespan, as if they were hitting a wall. Rather, this value is a target lifespan; some bubbles pop early, and others may last until the end.
- Bubble Growth Speed
- Specifies how fast a bubble reaches full size. When a bubble is released from the producer point, it generally starts out rather small. If you set this value too high and you specify a small producer area, the bubbles pop each other, and the effect generates fewer bubbles than expected.
- Strength
-
Influences how likely a bubble is to pop before it reaches
its Lifespan limit. Lowering a bubble’s Strength makes it more likely
to pop early in its life, when forces like wind and flow maps act
upon it. Lower values are good for soap bubbles. The highest value
is recommended for flocking animations.
Set
this value low, and set Pop Velocity high to create chain reactions
of popping bubbles.
Physics controls
The Physics controls specify the motion and behavior of the bubbles:
- Initial Speed
-
Sets the speed of the bubble as it is emitted by the producer
point. This speed is affected by the other Physics parameters.
Low Initial Speed values in conjunction with the
default producer size don’t affect the results much because the
bubbles bounce off each other. For more control over initial speed,
increase the values for Producer X Size and Producer Y Size.
- Initial Direction
- Sets the initial direction in which the bubble moves as it emerges from the producer point. This is affected by other bubbles and other Physics controls.
- Wind Speed
- Sets the speed of the wind that pushes the bubbles in the direction specified by Wind Direction.
- Wind Direction
- Sets the direction in which the bubbles blow. Animate this control to create turbulent wind effects. Bubbles are affected by wind as long as Wind Speed is greater than 0.
- Turbulence
- Applies small random forces to the bubbles, making them behave chaotically.
- Wobble Amount
- Randomly changes the shape of bubbles from perfectly round to a more natural elliptical shape.
- Repulsion
- Controls whether bubbles bounce off each other, stick to each other, or pass through each other. At a value of 0, bubbles don’t collide; they pass through each other. The higher the Repulsion value, the more likely bubbles are to interact with each other when they collide.
- Pop Velocity
- Controls how popping bubbles affect each other. When a bubble pops, it affects other bubbles around it by leaving a hole that other bubbles can fill, pushing other bubbles away, or popping other bubbles. The higher the value, the more popping bubbles affect one another.
- Viscosity
- Specifies the rate at which bubbles decelerate after being released from the producer point, and controls the speed of the flow of the bubbles. A high Viscosity value creates resistance as the bubbles get farther away from the producer point, causing them to slow down. If Viscosity is set high enough, the bubbles stop. The thicker the substance, the higher the Viscosity. For example, if you want to create the effect of bubbles traveling through oil, set Viscosity fairly high, so that the bubbles meet resistance as they travel. To create the effect of bubbles floating in air, set Viscosity fairly low.
- Stickiness
- Causes bubbles to clump together and makes them less vulnerable to other Physics controls like Wind Direction. The higher the Stickiness, the more likely the bubbles are to form clusters and cling. Use Stickiness and Viscosity to create a bubble cluster.
Zoom and Universe Size controls
- Zoom
- Zooms in or out around the center of the bubble universe. To create really large bubbles, increase the Zoom value instead of the Size value because large bubble sizes can be unstable.
- Universe Size
- Sets the boundaries of the bubble universe. When bubbles completely leave the universe, they pop and are gone forever. By default, the universe is the size of the layer. Values greater than 1 create a universe that stretches beyond the borders of the layer. Use higher values to make bubbles flow in from off-screen, or make it possible to zoom out and bring them back into the picture. Using a value lower than 1 clips the bubbles before they reach the edge of the layer. For example, when you want to confine bubbles to a specific area, such as inside a mask shape, set Universe Size a little larger than the mask size to remove all the extra bubbles and speed up the rendering process.
Rendering controls
The Rendering controls specify the appearance of the bubbles, including their texture and reflection:
- Blend Mode
- Specifies the relative transparency of bubbles as they intersect. Transparent blends the bubbles smoothly together, allowing you to see the bubbles through each other. Solid Old On Top makes a younger bubble appear to be underneath an older bubble and eliminates transparency. Use this setting to simulate bubbles flowing toward you. Solid New On Top makes younger bubbles appear to be on top of older bubbles and also eliminates transparency. Use this setting to make bubbles appear as if they are flowing downhill.
- Bubble Texture
-
Specifies the bubble texture. Use a preset texture, or create your
own. To see the texture, make sure that View is set to Rendered.
To create your own texture, select User Defined, and from the Bubble
Texture Layer menu, choose the layer you want to use as the bubble.
Note: The preset bubble textures are prerendered 64 x 64 images. If you zoom in above 64 x 64, the bubble appears blurry. To avoid this, use a higher-resolution custom bubble.
- Bubble Texture Layer
-
Specifies the layer you want to use as the bubble image. To
use this control, choose User Defined from the Bubble Texture menu.
If you want the layer to appear only as a bubble, turn off the video
switch for the layer in the Timeline panel.
Note: You can use any file type that After Effects supports. If you plan on zooming in or using a large bubble size, make sure that the resolution of the layer is high enough to avoid blurring. Remember, this doesn’t have to be a normal bubble. You can make blood cells, starfish, bugs, space aliens, or flying monkeys. If it’s a layer in your composition, it can be a bubble.
- Bubble Orientation
- Determines the direction that the bubble rotates. Fixed releases the bubble from the producer right side up and keeps it that way. Use this control if the bubble has built-in highlights and shading, as all of the preset bubbles do. Physical Orientation buffets and spins bubbles around by the forces on them, creating a chaotic scene. Bubble Velocity faces the bubble in the direction of its motion. This is the most useful setting for flocking-style animations.
- Environment Map
- Specifies the layer that is reflected in the bubbles. If you want to use this layer only for the reflection, turn off the layer’s video switch.
- Reflection Strength
- Controls how much of the selected Environment Map is reflected in the bubbles. The higher the value, the more the reflection obscures the original bubble texture. Reflections appear only on opaque pixels, so bubbles with high amounts of transparency, such as the Spit preset, don’t reflect much.
- Reflection Convergence
- Controls how much your Environment Map is distorted as it is mapped onto the bubbles. A value of 0 projects the map flat on top of all of the bubbles in the scene. As the value increases, the reflection distorts to account for the spherical shape of each bubble.
Flow Map controls
The Flow Map controls specify the map that the flow of the foam follows:
- Flow Map
-
Specifies the layer used to control the direction and speed
of the bubbles. Use a still image layer; if you select a movie as
the flow map layer, only the first frame is used. A flow map is
a height map based on luminance: White is high, and black is low.
White is not infinitely high; if a bubble travels fast enough, it
can travel past a white obstacle. Make sure that the map is a little
blurry; sharp edges can create unpredictable results. For example,
to make bubbles flow through a canyon, create a flow map with a
white canyon rim, a black canyon, and blurry gray walls. Use wind
to blow the bubbles in the direction you want them to flow, and
the walls of the canyon contain them. You can also use a gentle gradient
on the floor of the canyon to control the flow direction, but this
is somewhat more difficult to set up.
Note: If the bubbles don’t follow the map, use the Simulation Quality control. Also, try blurring the flow map a little to make sure that it does not have excessively abrupt edges.
- Flow Map Steepness
- Controls the difference between white and black as they are used to determine steepness. If the bubbles are ricocheting randomly off the flow map, decrease this value.
- Flow Map Fits
- Specifies whether the flow map is relative to the layer or to the universe. The flow map resizes itself to fit whichever you specify. This control is useful when you want to enlarge the universe but the flow map is designed for a particular layer, or when you want the bubbles to start off-screen and be affected by the flow map as they arrive onscreen.
- Simulation Quality
- Increases the precision, and therefore the realism, of the simulation. However, the higher the value, the longer the composition takes to render. Normal generally produces good results and takes the least amount of time to render. High returns better results but takes longer to render. Intense increases the rendering time but produces more predictable bubble behavior. Use this option if the bubbles aren’t following the flow map. It often solves problems of erratic behavior that can occur with small bubbles, high bubble speeds, and steep slopes.