

Particle Playground effect
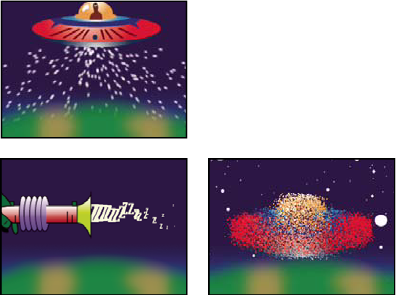
The Particle Playground effect lets you animate a large number of similar objects independently, such as a swarm of bees or a snow storm. Use the Cannon to create a stream of particles from a specific point on the layer, or use the Grid to generate a plane of particles. The Layer Exploder and Particle Exploder can create new particles from existing layers or particles. You can use any combination of particle generators on the same layer.
This effect works with 8-bpc color.
Start by creating a stream or plane of particles, or by exploding an existing layer into particles. Once you have a layer of particles, you can control their properties, such as speed, size, and color. You can replace the default dot particles with images from an existing layer to create, for example, an entire snowstorm from a single snowflake layer. You can also use text characters as particles. For example, you can shoot words across the screen, or you can create a sea of text in which a few letters change color, revealing a message.
Use Cannon, Grid, Layer Exploder, and Particle Exploder controls to generate particles. Use Layer Map control to specify a layer in place of each default dot particle. Use Gravity, Repel, and Wall controls to influence overall particle behavior. Use Property Mapper controls to influence particle properties. Use Options to set options, including those for substituting text characters in place of dots.
 Use Particle Playground
Particle content and particle generators
Particle Playground can generate three kinds of particles: dots, a layer, or text characters. You can specify only one kind of particle per particle generator.
Create particles by using the Cannon, the Grid, the Layer Exploder, and the Particle Exploder. The Grid creates particles in an organized grid format with straight rows and columns. The exploders create particles randomly, like firecracker sparks.
The particle generators set the attributes of particles at the moment they are created. After that, particle behavior is influenced by the Gravity, Repel, Wall, Exploder, and Property Mapper controls. For example, if you want particles to stick to grid intersections, you might use the Static Friction option in the Persistent Property Mapper to hold particles in place. Otherwise, as soon as particles are created, they begin moving away from their original grid positions.
Cannon controls
The Cannon is on by default; to use a different method to create particles, first turn the Cannon off by setting Particles Per Second to zero. The Cannon creates particles in a continuous stream.
- Position
- Specifies the (x,y) coordinates from which particles are created.
- Barrel Radius
- Sets the size of the Cannon’s barrel radius. Negative values create a circular barrel, and positive values create a square barrel. For a narrow source, such as a ray gun, specify a low value. For a wide source, such as a school of fish, specify a high value.
- Particles Per Second
- Specifies how often particles are created. A value of 0 creates no particles. A high value increases the density of the particle stream. If you don’t want the Cannon to fire continuously, set keyframes for this control so that the value is 0 at the times when you don’t want to create any particles.
- Direction
- Sets the angle at which particles are fired.
- Direction Random Spread
- Specifies how much each particle’s direction deviates randomly from the cannon direction. For example, specifying a 10-degree spread sprays particles in random directions within +/–5° of the cannon direction. For a highly focused stream, such as a ray gun, specify a low value. For a stream that widens quickly, specify a high value. You can specify up to 360°.
- Velocity
- Specifies the initial speed of particles in pixels per second as they emanate from the Cannon.
- Velocity Random Spread
- Specifies the amount of random velocity of particles. A higher value results in more variation in the velocity of particles. For example, if you set Velocity to 20 and Velocity Random Spread to 10, particles leave the Cannon at velocities ranging from 15 to 25 pixels per second.
- Color
- Sets the color of dots or text characters. This control has no effect if you use a layer as the particle source.
- Particle Radius
- Sets the radius of dots, in pixels, or the size of text characters in points. This control has no effect if you use a layer as the particle source.
Grid controls
The Grid creates a continuous plane of particles from a set of grid intersections. The movement of Grid particles is completely determined by the Gravity, Repel, Wall, and Property Mapper settings. By default, the Force control of Gravity is on, so Grid particles fall toward the bottom of the frame.
With the Grid, a new particle appears on every frame at each grid intersection. You can’t adjust this frequency, but if you want to turn off the Grid or make the Grid stop generating particles at specific times, set the Particle Radius/Font Size control to 0, or use keyframes to animate the value of the Particles Across and Particles Down controls. To make more particles appear in each frame, increase the values for Particles Across and Particles Down.
- Position
- Specifies the (x,y) coordinates of the grid center. When a grid particle is created, it is centered over its grid intersection, regardless of whether it is a dot, a layer, or a text character. If you’re using text characters as particles, the Use Grid option in the Edit Grid Text dialog box is on by default, placing each character on its own grid intersection, so normal character spacing, word spacing, and kerning do not apply. If you want text characters to appear at the grid position with normal spacing, use a text alignment other than the Use Grid option.
- Width, Height
- Specify the dimensions of the grid, in pixels.
- Particles Across, Particles Down
-
Specify the number of particles to distribute horizontally
and vertically across the grid area. Particles are generated only
when the value is 1 or more.
Note: If the Width, Height, Particles Across, and Particles Down controls are not available, the Use Grid option has been turned off in the Edit Grid Text dialog box.
- Color
- Sets the color of dots or text characters. This control has no effect if you use a layer as the particle source.
- Particle Radius/Font Size
- Sets the radius of dots in pixels or the size of text characters in points. This control has no effect if you use a layer as the particle source.
Layer Exploder and Particle Exploder
The Layer Exploder explodes a layer into new particles, and the Particle Exploder explodes a particle into more new particles. In addition to explosion effects, the exploders are also handy for simulating fireworks or for rapidly increasing the number of particles.
The following guidelines can help you control particles resulting from an explosion:
-
A layer is exploded once for each frame. By default, this creates a continuous shower of particles for the duration of the composition. If you want to start or stop a layer explosion, animate the Radius of New Particles control by using keyframes so that its value is zero at times when you don’t want particles to be created.
-
If the source of the layer is a nested composition, you can set different Opacity values or In and Out points for the layers within the nested composition to make the exploding layer transparent at different points in time. The Layer Exploder does not create particles where the source of the layer is transparent.
-
To change the position of the exploding layer, precompose the layer with its new position (use the Move All Attributes Into The New Composition option), and then use the precomposed layer as the exploding layer.
-
When you explode particles, the new particles inherit the position, velocity, opacity, scale, and rotation of the original particles.
-
After you explode layers or particles, the movement of particles is influenced by the Gravity, Repel, Wall, and Property Mapper controls.
 Some Persistent Property Mapper and Ephemeral Property
Mapper options can make explosions more realistic. For example,
change Opacity to make the resulting particles fade out, or change
the Red, Green, and Blue color channels to make resulting particles
change color as they appear to cool.
Some Persistent Property Mapper and Ephemeral Property
Mapper options can make explosions more realistic. For example,
change Opacity to make the resulting particles fade out, or change
the Red, Green, and Blue color channels to make resulting particles
change color as they appear to cool.
- Explode Layer
- (Layer Exploder only) Specifies the layer you want to explode. To make the video disappear the moment the particles appear, either turn off the video for the layer or trim the layer’s Out point.
- Radius Of New Particles
- Specifies the radius of the particles resulting from the explosion. This value must be smaller than the radius of the original layer or particle.
- Velocity Dispersion
- Specifies, in pixels per second, the maximum speed of the range within which Particle Playground varies the velocity of the resulting particles. High values create a more dispersed or cloudlike explosion. Low values keep the new particles closer together and can make the exploded particles resemble a halo or shockwave.
- Affects
- Specifies which particles are affected by the Layer Exploder and Particle Exploder.
Layer Map controls
By default, the Cannon, Grid, Layer Exploder, and Particle Exploder create dot particles. To replace the dots with a layer in the composition, use the Layer Map. For example, if you use a movie of a single bird flapping its wings as a particle source layer, After Effects replaces all dots with an instance of the bird movie, creating a flock of birds. A particle source layer can be a still image, a solid, or a nested After Effects composition.
A multiframe layer is any layer with a source that varies over time, such as a movie or a composition. When you map new particles to a multiframe layer, use the Time Offset Type control to specify how you want to use the layer’s frames. For example, use Absolute to map an unchanging image onto a particle, or use Relative to map an animating sequence of frames onto a particle. You can randomize both Absolute and Relative across particles.
- Use Layer
- Specifies the layer you want to use as the particles.
- Time Offset Type
-
Specifies how you want to use a multiframe layer’s frames.
For example, if you are using a layer of a bird flapping its wings
and you choose Relative for Time Offset Type with a Time Offset
of 0, the flapping wings for all the instances of the bird are synchronized.
While this might be realistic for a marching band, it is not realistic
for a flock of birds. To make each bird start flapping its wings
from a different frame in the layer, use Relative Random.
- Relative
- Starts playing the layer at a frame based on the Time Offset you specify, relative to the effect layer’s current time; then advances in step with the Particle Playground layer’s current time. If you specify a Time Offset of 0, all particles show the frame that corresponds to the effect layer's current time. If you choose a Time Offset of 0.1 (and your composition is set to 30 fps), each new particle displays the frame that is 0.1 seconds after the previous particle’s frame. Regardless of the Time Offset you specify, the first particle always displays the frame of the source layer that corresponds to the effect layer’s current time.
- Absolute
- Displays a frame from the layer based on the Time Offset you specify, regardless of the current time. Choose Absolute when you want a particle to show the same frame of a multiframe source layer for its entire lifespan, instead of cycling through different frames as the effect layer advances in time. For example, if you choose Absolute and specify a Time Offset of 0, every particle shows the first frame of the source layer for its entire lifespan. If you want to show a frame other than the first frame, move the layer earlier in time until the frame you want to show corresponds to the In point of the Particle Playground layer. If you specify a Time Offset of 0.1, for example, each new particle displays a frame that is 0.1 second after that of the previous particle (or every third frame of a 30-fps animation).
- Relative Random
- Starts playing the layer from a frame chosen at random, within the range between the effect layer’s current time and the Random Time Max you specify. For example, if you choose Relative Random and specify a Random Time Max of 1, each particle starts playing from a layer frame chosen at random from between the current time and 1 second after the current time. If, for another example, you specify a negative Random Time Max value of - 1, the Random Time Max is before the current time, so that the range within which new particles start playing advances as the current time advances. However, the range is always between the current time and one second earlier than the current time.
- Absolute Random
- Takes a frame at random from the layer, by using a time between 0 and the Random Time Max you specify. Choose Absolute Random when you want each particle to represent a different single frame of a multiframe layer. For example, if you choose Absolute Random and specify a Random Time Max of 1, each particle shows a layer frame from a random time between 0 and 1 second into the layer’s duration.
- Time Offset
- Specifies the frame from which to start playing sequential frames from the layer.
- Affects
- Specifies which particles are affected by the Layer Map controls.
Replace default Cannon particles with text
You can use text characters as particles. For example, you can type a message that the Cannon shoots across the frame. You can also change the attributes of any three sets of characters. For example, you can make some of the characters larger or brighter than others.
Replace default Grid particles with text
- In the Effect Controls panel, click Options, and then click Edit Grid Text.
- Set the following options:
-
For Font/Style, choose the font and style for Grid characters.
-
For Alignment, click Left, Center, or Right to position text in the text box at the Position specified in the Grid control, or click Use Grid to position each letter in the text on consecutive grid intersections.
-
For Loop Text, select to repeat the characters you typed until all the grid intersections contain one character. Grid intersections are specified by the Particle Across and Particle Down controls. Deselect to generate only one instance of the text. (This option is available only if you select Use Grid alignment.)
-
- Type text in the text box. If Use Grid alignment is selected and you want to skip a grid intersection, type a space. To force the next character down to the next grid row, press Enter (Windows) or Return (Mac OS).
- Click OK to close Edit Grid Text, and then click OK to close the Particle Playground dialog box.
- Click the right-facing triangle next to Grid so that it points downward.
- Click the Font Size value, type a value of 10 or greater, and press Enter (Windows) or Return (Mac OS).
If you want to stop replacing default particles with text, delete all text from the text box in the Edit Grid Text dialog box.
Changing a particle over its lifespan
Some controls affect the particle from birth: Cannon, Grid, Layer Exploder, and Particle Exploder. Others affect the particle after birth and over the course of its lifespan: Gravity, Repel, Wall, Persistent Property Mapper, and Ephemeral Property Mapper. To have full control over particle movement and appearance, you must balance these controls.
For example, if you want to use the Cannon to shoot sparks that fade over time, it may seem that you need only animate the Cannon’s Color control. However, using this method, you change only the color of each new particle as it’s created. To control the color for the lifespan of particles, you must create a layer map and use one of the Property Mappers to alter the particles’ color channels.
The following list covers common particle behavior and how you can influence it.
- Speed
- At particle creation, particle velocity is set by the Cannon and the exploders; Grid particles have no initial speed. After particle creation, use the Force control in the Gravity and Repel control groups. You can also influence the speed of individual particles by using a layer map to set values for the Speed, Kinetic Friction, Force, and Mass properties in the Property Mappers.
- Direction
- At particle creation, the Cannon includes particle direction; the Layer Exploder and Particle Exploder send new particles in all directions; and Grid particles have no initial direction. After particle creation, direction can be influenced by the Direction control in the Gravity control group or by specifying a Boundary (mask) in the Wall control group. You can also influence the direction of individual particles by using a layer map to set values for the Gradient Force, X Speed, and Y Speed properties in the Property Mappers.
- Area
- Use a Wall mask to contain particles to a different area or to remove all barriers. You can also restrict particles to an area by using a layer map to set values for the Gradient Force property in the Property Mappers.
- Appearance
- At particle creation, the Cannon, Grid, Layer Exploder, and Particle Exploder set particle size unless you replace the default dots with a layer map. The Cannon and Grid set the initial color, while the Layer Exploder and Particle Exploder take color from the exploded dot, layer, or character. The Options dialog box affects the initial appearance of text. After particle creation, you can use the Property Mappers to set values for Red, Green, Blue, Scale, Opacity, and Font Size.
- Rotation
-
At particle creation, the Cannon and Grid set no rotation;
the Particle Exploder takes rotation from the exploded dot, layer,
or character. Use Auto-Orient Rotation to make particles rotate
automatically along their respective trajectories. For instance,
a particle can point up as it climbs an arc, and point down as it
descends. Rotation isn’t easily visible for a dot particle. It is
easier to observe only when you replace the dot particle with text
characters or a layer. After particle creation, use a layer map
to set values for the Angle, Angular Velocity, and Torque property
in the Property Mappers.
Note: The appearance and rotation of a layer map particle changes in relation to the mapped layer’s original appearance and rotation. For instance, if you replace the default dot particles with a movie of a spinning wheel, the spinning-wheel particles appear to spin when no particle rotation is applied.
Gravity controls
Use Gravity controls to pull existing particles in a direction you specify. Particles accelerate in the direction of gravity. Apply in a vertical direction to create falling particles, such as rain or snow, or rising particles, such as champagne bubbles. Apply in a horizontal direction to simulate wind.
- Force
- Specifies the force of gravity. Positive values increase the force, pulling particles more strongly. Negative values reduce the force.
- Force Random Spread
- Specifies a range of randomness for the Force. At zero, all particles fall at the same rate. At a higher value, particles fall at slightly different rates. Although pure gravity accelerates all objects equally, increasing the Force Random Spread value can produce more realistic results with subjects such as leaves falling through air, where there is enough air resistance to vary the leaves’ rates of descent.
- Direction
- Specifies the angle along which gravity pulls. The default is 180°, which simulates the real world by pulling particles toward the bottom of the frame.
- Affects
- Specifies a subset of the layer’s particles to which Gravity applies.
Repel controls
Repel controls specify how nearby particles repel or attract each other. This feature simulates adding a positive or negative magnetic charge to each particle. You can specify which particles, layers, or characters are the repelling force and which are repelled.
- Force
- Specifies the repel force. Greater values repel particles with more force. Negative values result in particle attraction.
- Force Radius
- Specifies the radius (measured in pixels) within which particles are repelled. Another particle must be within this radius to be repelled.
- Repeller
- Specifies which particles act as the repellers or attractors to another subset you specify by using the Affects control.
- Affects
- Specifies a subset of the layer’s particles to which repulsion or attraction applies.
Wall controls
Wall controls contain particles, limiting the area within which particles can move. A wall is a closed mask that you create by using a mask tool, such as the Pen tool. When a particle hits the wall, it bounces off at a velocity based on the force with which it hit.
- Boundary
- Specifies the mask to use as the wall. You can create a new mask by drawing one on the effect layer.
Affects controls
Many Particle Playground controls include Affects controls. Affects controls specify which particles are affected by the encompassing control. For example, the Affects controls within the Particle Exploder controls specify which particles the Particle Exploder affects.
- Particles From
- Specifies the particle generator or combination of particle generators whose particles you want to affect.
- Selection Map
-
Specifies the layer map that influences which particles are affected.
Note: The simulation space is not bounded by the dimensions of the layer to which Particle Playground is applied. You may need to use a selection map that is larger than the Particle Playground layer so that dots that are not visible are still affected by Selection Map.
- Characters
- Specifies the characters you want to affect. This control applies only if you are using text characters as the particle type.
- Older/Younger Than
- Specifies the age threshold, in seconds, above or below which you want to affect a particle. Positive values affect older particles, and negative values affect younger particles. For example, a value of 10 means that as soon as a particle reaches 10 seconds, it changes to the new value.
- Age Feather
- Specifies the age range in seconds within which the Older/Younger Than value is feathered, or softened. Feathering creates a gradual, rather than abrupt, change. For example, if you set Older/Younger Than to 10 and Age Feather to 4, about 20% of particles start changing when they’re 8 seconds old, 50% change when they’re 10 seconds old (the Older/Younger Than value), and the remainder change by the time they’re 12 seconds old.
Use Particle Playground Property Mapper controls
You can control specific properties of individual particles by using a layer map and either the Persistent Property Mapper or the Ephemeral Property Mapper. You can’t alter a specific particle directly, but you can use a layer map to specify what happens to any particle that passes over a specific pixel in the layer. Particle Playground interprets the brightness of each layer map pixel as a specific value. The Property Mapper associates a specific layer map channel (Red, Green, or Blue) with a specific property, so that as a particle passes over a certain pixel, the brightness value at that pixel modifies the property.
A particle property can be modified in either a persistent or an ephemeral way:
-
A persistent change to a particle property retains the most recent value set by a layer map for the remaining lifespan of the particle, unless the particle is modified by another control such as Repel, Gravity, or Wall. For example, if you use a layer map to modify particle size and you animate the layer map so it exits the frame, the particles keep the last size value set by the layer map after it exits the frame.
-
An ephemeral change to a particle property causes the property to revert to its original value after each frame. For example, if you use a layer map to modify particle size and you animate the layer map so that it exits the frame, each particle returns to its original size value as soon as no layer map pixels correspond to it. Similarly, if you apply an operator such as Add, each time a particle passes over a different layer map pixel, the value of the layer map pixel is added to the original value of the particle.
In both the Persistent and Ephemeral Property Mappers, you can control up to three particle properties independently by using a single RGB image as a layer map. Particle Playground achieves this by extracting brightness values separately from the red, green, and blue channels in the image. You don’t have to use all three channels if you want to modify just one property. To change just one property or change up to three properties using the same values, use a grayscale image as the layer map because the RGB channels are identical.
In combination with keyframes or expressions, the Property Mappers provide complete control over individual particle properties in space and time. Using layer maps, you can change particle properties at any location within a frame. By applying keyframes or expressions to Property Mapper options and animating a layer map, you can control how particle properties change.
- If using the Ephemeral Property Mapper, you can apply
an operator to the value of a particle property and the value of
the corresponding layer map pixel.
Note: Because particle properties use many kinds of units, such as pixels, degrees, and seconds, you may want to compress or expand the range of values from the layer map so that all the resulting values are usable in the measurement system of a specific particle property. First, use the Min and Max controls, which define the range of values to use from the layer map. If further adjustment is necessary and you’re using the Ephemeral Property Mapper, use the Operator control and choose a mathematical operator to amplify, attenuate, or limit the effect of a layer map.
In both the Persistent and Ephemeral Property Mappers, you can use a layer map’s alpha channel to make more subtle changes to the value of a particle property. For example, particles over a layer-map pixel in which the alpha channel value is 255 are fully affected, while lower values affect particles less. Layer-map pixels that are completely transparent have no effect on particle properties.
When you choose any of the following properties, Particle Playground copies the value from the layer map (that is, the layer selected in the Use Layer as a Map menu) and applies it to the particle.
- None
- Modifies no particle property.
- Red, Green, Blue
- Copy the value of the particle’s red, green, or blue channel within a range of 0.0–1.0.
- Kinetic Friction
- Copies the amount of resisting force against a moving object, typically within a range of 0.0–1.0. Increase this value to slow down or stop moving particles, as if braking.
- Static Friction
- Copies the amount of inertia that holds a stationary particle in place, typically within a range of 0.0–1.0. At zero, a particle moves when any other force, such as gravity, is present. If you increase this value, a stationary particle requires more of another force to start moving.
- Angle
- Copies the direction in which the particle points, in degrees relative to the particle’s original angle. The angle is easily observable when a particle is a text character or a layer without radial symmetry.
- Angular Velocity
- Copies the velocity of particle rotation in degrees per second. This determines how fast a particle rotates around its own axis.
- Torque
- Copies the force of particle rotation. The angular velocity of a particle is increased by a positive torque and is increased more slowly for particles of greater mass. Brighter pixels affect angular velocity more forcefully; if enough torque is applied against angular velocity, the particle starts spinning in the opposite direction.
- Scale
- Copies the scale value of a particle along both the x and y axes. Use this to stretch a particle proportionally. A value of 1.0 scales the particle to its full size; a value of 2.0 scales it 200%, and so on.
- X Scale, Y Scale
- Copy the scale value of a particle along the x or y axis. Use these to stretch a particle horizontally or vertically.
- X, Y
- Copy the position of a particle along the x or y axis in the frame, in pixels. A value of zero specifies a position at the left of the frame (for X) or at the top of the frame (for Y).
- Gradient Velocity
- Copies the velocity adjustment based on areas of a layer map on both the x and y planes of motion.
- X Speed, Y Speed
- Copy the horizontal speed (x-axis velocity) or vertical speed (y-axis velocity) of a particle in pixels per second.
- Gradient Force
-
Copies the force adjustment based on areas of a layer map
on both the x and y planes of motion. The pixel brightness values
in the color channel define the resistance to particle force at
each pixel, so the color channel acts like a layer map of hills
and valleys that decrease or increase particle force. In the layer
map, areas of equal brightness result in no adjustment, similar
to flat land. Lower pixel values represent less resistance to a
particle’s force, similar to a downhill grade. Higher pixel values
represent more resistance to a particle’s force, similar to an uphill
grade. For best results, use a soft-edged layer map image.
If you are using a layer map for Gradient Force
where flat areas equal no adjustment, and you are using the Min
and Max controls (not the Min or Max operators) to set the range
of values for Gradient Force, set them to positive and negative
values of the same number (for example, –30 and +30). This ensures
that the middle of the range remains centered at zero.
- X Force
- Copies the coercion along the x axis of motion. Positive values push a particle to the right.
- Y Force
- Copies the coercion along the y axis of motion. Positive values push a particle down.
- Opacity
- Copies the transparency of a particle, where zero is invisible, and 1 is solid. Adjust this value to fade particles in or out.
- Mass
- Copies the particle mass, which interacts with all properties that adjust force, such as Gravity, Static Friction, Kinetic Friction, Torque, and Angular Velocity. It takes greater force to move particles with a larger mass.
- Lifespan
- Copies the elapsed length of time a particle exists, in seconds. At the end of its lifespan, the particle is removed from the layer. The default lifespan is effectively immortal.
- Character
-
Copies the value that corresponds to an ASCII text character,
making it replace the current particle. Applies only if you’re using
text characters as particles. You can specify which text characters
appear by painting or drawing shades of gray on the layer map that
correspond to the ASCII characters you want. A value of zero produces
no character. For US English characters, use values between 32 and
127. The range of possible values can accommodate Japanese characters.
For more information about the ASCII character values for a font you’re
using, see the documentation for the font, use a utility such as
Character Map (Windows), or contact the font manufacturer.
Note: If you simply want to make certain characters spell a message, it’s much easier to type the text directly in the Options dialog box. The Character property is more useful as a secret message effect in which you scramble text characters.
- Font Size
- Copies the point size of characters. Applies only if you’re using text characters as particles. Increase this value to make characters larger.
- Time Offset
- Copies the Time Offset value used by the Layer Map. Applies only if you used the Layer Map control to specify a multiframe layer (such as a movie) as a particle source.
- Scale Speed
- Copies the scale of a particle. Positive values expand the particle, and negative values shrink the particle. Particles expand or shrink by a percentage per second.
Min and Max controls for Property Mappers
When the overall range of layer map brightness values is too wide or narrow, use Min and Max to stretch, compress, or shift the range of values produced by the layer map. The following examples describe when you might want to adjust Min and Max:
-
You want to set the smallest font size for your text to 10 points and the largest size to 96 points. Set the Min value to 10 and the Max value to 96.
-
You set the initial color of a particle and then use a layer map to change particle colors. If you find that the color changes aren’t dramatic enough, you can lower the Min value and raise the Max value to increase the contrast of the color changes.
-
You set the initial velocity of a particle and then use a layer map to affect the X Speed value. However, you find that the difference between the fastest and slowest particles is too great. By raising the Min value and lowering the Max value for the layer map channel that is mapped to the X Speed value, you narrow the resulting range of particle speeds.
-
You use a layer map to affect the Scale property of particles and find that the smallest particles aren’t small enough while the largest resulting particles are too large. In this case, the entire output range needs to be shifted down; lower both the Min and Max values.
-
You have a layer map that modifies particles in the opposite direction from the one you want. Swap the Min and Max values, which has the same result as inverting the layer map.
Note: The alpha channel of the layer map is used as the selection map for the Persistent and Ephemeral Property Mappers.
Operator controls for the Ephemeral Property Mapper
When you use the Ephemeral Property Mapper controls, Particle Playground replaces the value of a particle’s property with the value represented by the layer map pixel at the particle’s current location. You can also amplify, attenuate, or limit the resulting values by specifying a mathematical operator and then using both the value of a particle’s property and its corresponding layer map pixel value.
- Set
- Replaces the value of a particle property by the value of the corresponding layer map pixel. For example, to simply replace the value of a particle property with the brightness value of the corresponding pixel on the layer map, use Set. This is the most predictable operator and is the default.
- Add
- Uses the sum of the value of a particle property and the value of the corresponding layer map pixel.
- Difference
- Uses the absolute value of the difference of the value of a particle property and the brightness value of the corresponding pixel on the layer map. Because it takes the absolute value of the difference, the resulting value is always positive. This operator is useful when you want to limit values to only positive values. If you’re trying to model realistic behavior, the Difference operator may not be ideal.
- Subtract
- Starts with the value of a particle property and subtracts the value of the brightness value of the corresponding pixel on the layer map.
- Multiply
- Multiplies the value of a particle property by the brightness value of the corresponding pixel on the layer map and uses the result.
- Min
- Compares the brightness value of the layer map to the value of the particle property and uses the lower value. To limit a particle property so that it is less than or equal to a value, use the Min operator and set both the Min and Max controls to that value. If you use a white solid as a layer map, you need only set the Max control to that value.
- Max
- Compares the brightness value of the layer map to the value of the particle property and uses the higher value.
To amplify existing values of properties, try applying
the Add operator with positive values or the Multiply operator with
values above 1.0. To attenuate (tone down) property value changes,
try applying the Multiply operator using values between 0 and 1.0.Layer maps for Particle Playground
A layer map is an image in which each pixel’s brightness value is used by an effect in a calculation. Particle Playground uses a layer map to exercise precise control of a particle property such as opacity. In this way, After Effects doesn’t use a layer map as a picture but as a matrix of numbers. In many cases, you never see the actual layer map in the final movie—you see only the result of an effect applying the layer map’s pixel values to the corresponding pixels in a destination layer.
Regardless of the color depth of the image that you use as a layer map, After Effects always uses its red, green, and blue channels as if each were an 8-bpc grayscale image. If you create a layer map using colors, the Property Mappers in Particle Playground can extract the brightness values from each RGB color channel separately.
A layer map is often used as a stationary layer of the same dimensions as its destination layer. The value of each pixel in the layer map applies only to one specific pixel at the corresponding position in the destination layer. However, when you animate a layer, the appearance of the pixels in the destination layer changes depending on which layer-map pixel corresponds to it at a particular point in time. Layer maps are often animated so that the layer map effect appears to sweep through the destination layer.
Layer maps are often created by painting in an image-editing program, such as Adobe Photoshop, although you can use any program that can save an image compatible with After Effects. The key to creating a good layer map is to remember that the brightness value of each pixel influences an effect property. Here are some hints and tips for creating layer maps:
-
If you want a layer map to match the shape of an image that already exists, simply use that image. For best results, create a layer map that has the same dimensions as the layer containing the image.
-
You can create a layer map by precomposing a white solid layer, a black solid layer, and a mask on the top layer that determines which areas are white and black. Increasing the mask’s feather softens the transition between black and white values.
-
In Photoshop, an easy way to create a layer map is to create a layer with a black or white background, draw a selection, and fill the selection with the opposite color. Blurring the entire layer softens the transition between black and white values.
-
You can set layer map values more precisely by painting shades of gray within a range from 0 (black) to 255 (white). This is the tonal range of an 8-bit channel. To simplify painting or drawing, see if your image-editing program provides or allows you to create a palette of 256 gray shades.
Note: While images created for use as displacement maps (in other effects or programs) often map tones to values on a scale from –127 to +127, Particle Playground interprets tones of gray as values on a scale from 0.0 (black) to 1.0 (white). If you’re using images created as displacement maps, use the Min and Max controls to modify the range of tones produced by the layer map. -
The alpha channel in a layer map modifies the value before it’s applied to the destination layer. Areas where the alpha channel is completely off (transparent areas of a layer map) don’t affect on particle values. Areas where the alpha channel has a partial value (semitransparent areas of a layer map) partially affect the particle value. For example, if a layer-map pixel has a value of 10 and the layer-map alpha channel has a value of 127 (50%), the layer-map pixel is affected by 50%, and its true value is 5. When you use the Persistent and Ephemeral Property Mappers, the actual value applied to a particle is also affected by the range set for the Min and Max controls.
-
If you want to change any of the layer map’s layer properties (Masks, Effects, or Transform), change them, precompose the layer, and then use the resulting composition as the layer map. Otherwise, Particle Playground ignores any property settings.
-
The contrast between adjacent pixel values determines how smoothly the values change across the surface of the layer map. To create smooth changes, paint using a soft or anti-aliased brush, or apply gradients. To create abrupt changes, avoid intermediate shades, using just a few widely spaced shades, such as 50% gray, black, and white.
-
You can adjust overall edge contrast with blur or sharpen filters, if your painting or drawing program provides them.
Note: If you want to edit individual pixels, open the layer map in the program you used to create it and make the change.
Before
you apply a layer map to a particle layer, they must be in the same
composition, in a stacking order that produces the results you want.
If you want particles to be visible in front of the layer map, make
sure that the layer with Particle Playground applied is in front
of the layer map. If you don’t want the layer map to be visible,
hide it by clicking the layer’s eye icon  in
the Timeline panel.
in
the Timeline panel.
RGB layer maps
Particle Playground can extract brightness values separately from the red, green, and blue channels in an image. If you want to create different layer maps for each channel, use a program that can edit individual color channels, such as Adobe Photoshop, and then paint or paste each layer map into its own channel. Save the layer map as an RGB image in a format After Effects can import. The image may look unusual when viewed in RGB mode because it’s intended to be used as a single hidden layer containing three different layer maps, not as a visible color layer.
When you apply an effect that can use each color channel as a separate layer map, you can still use a grayscale image; the RGB channels will be identical.
If you already have three
separate images, you can combine them into a single RGB file by
using the Set Channels effect. Set Channels can load each image
into its own channel in a combined file, making it suitable for
use as an RGB layer map. Improving performance with Particle Playground
Keep the following in mind when working with the Particle Playground effect:
-
When you’re generating a Particle Playground effect, keep an eye on the Info panel to see how many particles are being produced. If an effect contains more than 10,000 particles, it can significantly slow rendering. If you notice performance problems, set Particles Per Second and/or Particles Down to relatively low values (between 1 and 100).
-
The Grid and Layer Exploder generate particles on every frame, which may generate too many particles for the effect you’re creating and slow down rendering. To avoid continuous particle generation, animate these controls to decline to zero over time: Layer Exploder, Radius of New Particles, Grid Width and Height, Particle Radius, and Font Size. Then Particle Playground generates new particles only at the start of a sequence.
-
When you apply a Particle Playground effect to a layer, the particle positions aren’t limited to the bounds of that layer. To control particles that you can't see or that appear near the edge of the image, use a Selection or Property Map that’s larger than the area of the Particle Playground layer. Also, note that After Effects takes an image map’s alpha channel into account. If you want transparent areas of your map to affect the particles, precompose the map layer with a black solid behind it.
To specify field rendering with a Particle Playground effect, select Enable Field Rendering in the Particle Playground options dialog box. Then Particle Playground calculates the simulation at double the frame rate of the current composition, which is what field rendering requires.