Getting Started with Flash Lite 1.x ![]()
Getting Started with Flash Lite 1.x |
|
|
|
| Creating a Flash Lite Application > Creating the application > Creating the specials screen > Creating the image animation | |||
In this section you'll create the tweened animation that transitions between images of each special. When you've completed this section, the animation will play through without stopping. Later in the tutorial, you'll add navigation and ActionScript that lets the user control the animation with the device's Right soft key.
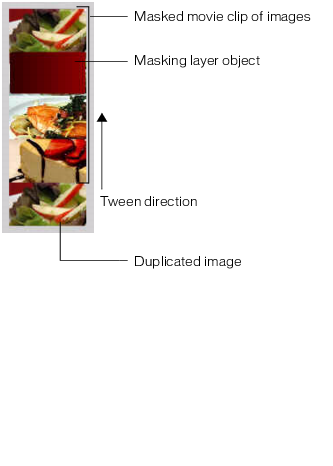
To create the animation you'll use a prebuilt movie clip that contains images of all the specials arranged in a vertical column. You'll use a masking layer to make only one of the images visible. Then you'll create a series of tweens that move the movie clip upward, so that a different image is visible. The last image in the movie clip is a duplicate of the first one, so that the animation sequence can return to its initial state after the user has viewed the final image. The following image illustrates these concepts:
In the last section of the tutorial, you'll add ActionScript and user interface elements that let the user control the animation sequence.
 To create the image animation:
The rest of this tutorial refers to this movie clip simply as the images movie clip.
This aligns the top-left corner of the images movie clip with the top-left corner of the Stage.

This moves the movie clip upward on the Stage 100 pixels.
This tweens the images movie clip's position between the keyframes on Frames 10 and 20.

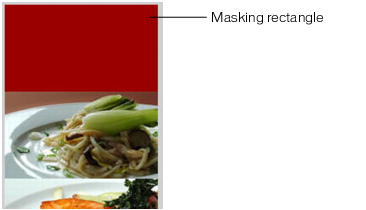
It doesn't matter what fill color you use for the rectangle, but it must be completely opaque.
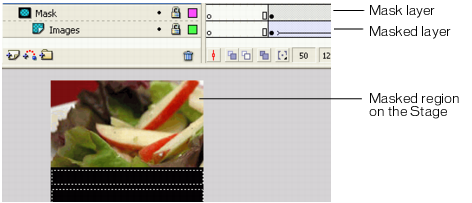
The layer is converted to a mask layer, indicated by a mask layer icon. The layer immediately below it is linked to the mask layer, and its contents show through the filled area on the mask. For more information about working with mask layers in Flash, see "Using mask layers" in Using Flash.
At this point, if you were to test the application in the emulator, the animation you created would play through to the end and then stop. In the next section (see Adding navigation and text to the specials screen), you'll add ActionScript that stops the animation at each keyframe, as well as user interface elements that let the user navigate between images.
|
|
|
|