Connecting to Servers with VAIO Media
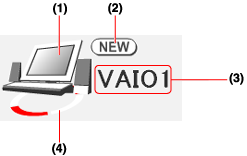
With VAIO Media installed on your server computer, you can select which server to connect to from the main menu. Please remember, to make sure that the server is accessible to clients on the network.
Some versions of the VAIO Media-related software installed on the server may operate with certain limitations when accessing media from a client with VAIO Media.
The status of each server is indicated in the "Please select a server" screen, next to the server name, as follows.


(1) Indicates the type of server.
Depending on your server, one of the following icons is displayed.
This server is a VAIO with VAIO Media Server 2.5 or later installed.
This server is a VAIO with VAIO Media Server 2.0 installed. See Note 1.
This server is not a VAIO, but you can still play back the media that it contains on clients. Note that depending on format and bit rate of some of the media, you may not be able to play back all media.
This server is UPnP-compatible. (Operation not guaranteed.)
A grayed icon indicates that the server has been connected to the server in the past, but it is now in an unknown state (it is off, on standby, or it cannot otherwise be detected by the network). Verify the status of the server. See Note 2.

(2) If this is the first time you connect to this server, this mark is displayed.

(3) Indicates the name of the server. This name appears shaded if it is not possible to connect to the server. See note 3.

(4) Appears to revolve when you are connected to the server.

Note 1
The following limitations may apply to accessing media with VAIO Media, depending on the server status and the VAIO Media version.
  • Video thumbnails are not displayed in the video list. Dummy thumbnails are displayed in the list instead.
  • It is not possible to use the film roll area to jump to specific scenes while playing back video.
  • It is not possible to search through all media or to sort the media list.
Hint
You can verify the version of VAIO Media Server when you start VAIO Media Console.
Note 2
If the server's Wake-On-LAN setting (a setting that automatically starts your server) is enabled, the server automatically starts when its name is selected. For details about how to set this automatic startup function, refer to your computer's manual and Setting VAIO to Start Automatically.
VAIO is unable to start and connect automatically in the following circumstance, even if the automatic startup setting is enabled.
  • The server is off.
Note 3
For example, if you start VAIO Media on an unregistered client, the server icon appears, but its name is shaded, indicating that you cannot connect to the server. To be able to connect to the server, you must register your client first. To do so, see Preparing your Network for use with VAIO Media, and perform the procedure outlined in Registering Clients.


You can set the server to start automatically when a client connects to it. Therefore, even if the client is far from the server, it is still possible to start the server.
  • Depending on the settings of the server, you may not be able to use this function. For example, if the server is a laptop computer and you establish a connection to the server through a wireless LAN, you cannot use this function.
  • When using this function, the server standby and hibernation settings must be active. You can set the modes that the server will enter when the connection is broken from the client with the server's power options. For details, see Confirming and Changing Standby Settings below.
Perform the following procedure on the server so that it starts automatically.

1 On the Start menu, click Control Panel.
Control Panel appears.

2 Click Performance and Maintenance, and then System.
The System Properties dialog box appears.
Hint
If Control Panel is in Classic View, double-click the System icon to open the System Properties dialog box.

3 On the Hardware tab, click Device Manager.
The Device Manager window appears.

4 Double-click Network adapters.

5 Double-click the network device used as the server.
The network device properties dialog box appears.

6 Make the following settings on the Power Management tab.
  • Select the "Allow the computer to turn off this device to save power" check box.
  • Select the "Allow this device to bring the computer out of standby" check box.
  • Select the "Only allow management stations to bring the computer out of standby" check box.

7 Click OK to close the network device properties dialog box.

8 Click to close the Device Manager window, and then click OK to close the System Properties dialog box.
It is possible to set the server so that when client breaks the connection and the server remains idle for a certain period of time, it will automatically go into standby. You can confirm or change how long a server goes into standby by performing the following procedure.

1 On the Start menu, click Control Panel.
Control Panel appears.

2 Click Performance and Maintenance, and then Power Management.
The Power Options Properties dialog box appears.

3 Click the Power Schemes tab.

4 Select the times for System standby and System hibernates. These settings control the duration and time a system goes into standby or hibernation.
Set these options to After 3 mins or longer. If you set these options to Never, the computer does not go on standby or hibernate.

5 Click OK to close the Power Options Properties dialog box.