| The control panel | |||||
| The control panel stretches across the bottom of the application window. It consists of three main areas: the media information display on the left, the input panel in the center, and the action area on the right. |
|||||
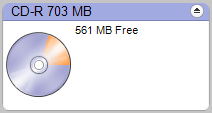
This example of the media information
display shows a 700 MB CD-R is in the destination drive. The picture of
the disc shows the amount of space the current project would use. To eject
the disc from most drives, click on the eject button at the top right-hand
corner.
| Media information display |
||||
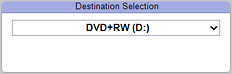
This example of the input area shows
a drop-down menu you can use to select the destination drive for your
projects. If you only have one recorder drive, it will be automatically
selected for most projects. |
Input area |
||||
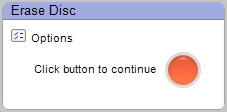
This example of the action area
shows the button you click to complete your project. The small icon in
the upper-left corner is the Options button. Click on it to change your
program settings. |
Action area |
||||
© 2000-2006 Sonic Solutions. All Rights Reserved. |