Connect
the microphone to the mic‑level input jack on the computer or sound card.
If necessary, choose Edit > Preferences >
Audio Hardware (Windows) or Premiere Pro > Preferences >
Audio Hardware (Mac OS) to configure the input device.
If you want to preview the Timeline panel as you record,
position the current‑time indicator in the Timeline panel a few
seconds before the time when you want the voice‑over to begin.
In the Audio Mixer, click the Record Enable button for
any tracks on which you want to record audio.
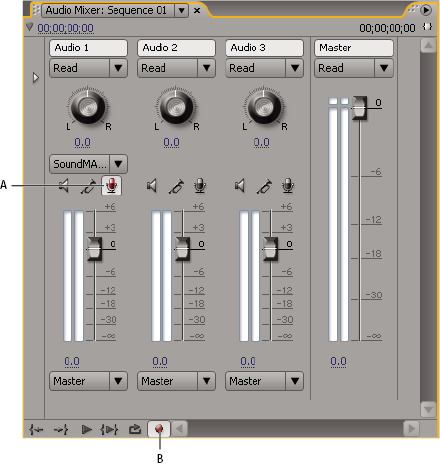
Audio Mixer recording controls
A.
Record Enable button for track
B.
Record
button for Audio Mixer
In the Audio Mixer, click the Record button for the sequence.
Adobe Premiere Pro prepares the sequence for recording but moves
the playhead only when you press the Play button.
Select Meter Input(s) Only in the Audio Mixer menu to
meter only the sound card’s inputs.
Test the input levels by speaking into the microphone.
When you finish testing, deselect Meter Input(s) Only
to meter the project’s audio tracks also.
Speak into the microphone again. Watch the Audio Mixer
level meters to ensure that the input levels for record‑enabled
tracks are high but not clipping.
Click the Play button in the Audio Mixer, and then start
speaking the voice‑over.