

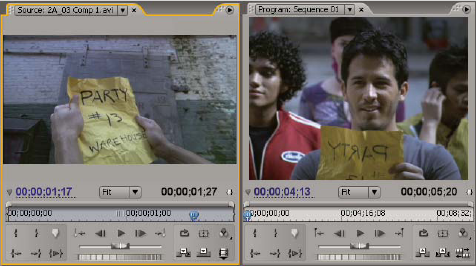
Source and Program Monitors overview
The Source Monitor plays back individual clips. In the Source Monitor you prepare clips that you want to add to a sequence by specifying In and Out points and the clip’s source tracks (audio or video). You can also insert clip markers and add clips to a sequence in the Timeline panel.
The Program Monitor plays back the sequence of clips that you are assembling. It’s your view of the active sequence in the Timeline panel. You can set sequence markers and specify a sequence’s In and Out points, which define where frames are to be added or removed from the sequence.
Each monitor contains both a time ruler and controls to play back and cue the current frame of a source clip or sequence.
 Set display quality
You can reduce the resolution of the Source or Program Monitors to decrease the processing demands on your computer. Reducing the quality setting of the Program Monitor may allow your system to create real‑time previews of parts of the sequence that would otherwise require rendering.
 In the Source or Program Monitor panel menu, choose
a quality setting:
In the Source or Program Monitor panel menu, choose
a quality setting: - Highest Quality
- Displays video in the monitor at full resolution.
- Draft Quality
- Displays video in the monitor at one‑half resolution.
- Automatic Quality
-
Measures playback performance and dynamically adjusts quality.
Note: All quality settings use a bilinear pixel resampling method to resize the video image. For exporting a sequence, a cubic resampling method (which is superior to bilinear) is used.